Change page size when scanning in Windows 10
If you’re scanning images using Window’s native drives and software (i.e. not those provided by your scanner manufacturer) you may often hit the wall of not being able to change scanned page side due to fact that corresponding list is disabled:

In this article I’ll show you how to change this value (page size). But, keep in mind that this will be a one time solution. As far as I know there is now permanent solution for this problem.
Contents
Power… that is not in your hands
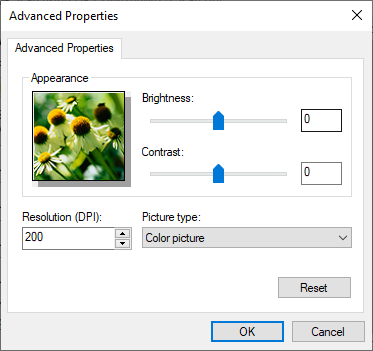
Due to some weird design of Windows 10’s native scan software you can’t make that field enabled even after selecting Custom Settings above. And, if you click Adjust the quality of the scanned picture you will see a window that allows you to change a lot of scan’s settings but… not the page size:
If you wish to change page size when doing a regular scan from flatbed, you must…:
- change scan mode to document feeder for a moment
- set page size (only then corresponding list will be enabled)
- and change scan mode back to flatbed.
Only then you will be able to scan a page from from flatbed in a format of your choice (other than default format for your Windows’ language — i.e. Legal 8.5 x 14 inches for English).
Not only this is unhandy and annoying, but it is also a one-time solution. Below you have some tips on working with scan profiles, but it eventually turned out that these changes didn’t actually solve anything.
Changing Windows 10’s scan profiles
Initially I thought that the reason for setting incorrect page size in scan dialog is a mess in my scan profiles in Windows 10.
First steps:
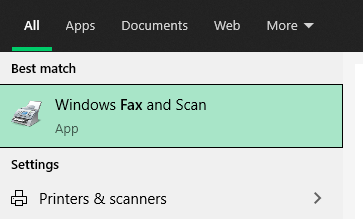
- Hit Start, type Fax, hover Windows Fax and Scan and hit Enter to confirm.
- Then select Tools > Scan Settings… from menu.
And then you should see something like this:
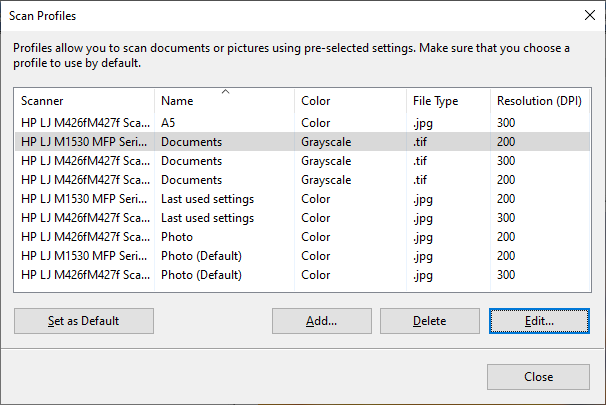
Windows is messy and so is its native scan software. You can have multiple scan profiles with the same name, but only, if they’re created by some other software. You as an user cannot create two or more profiles with the same name. And, by the same rule, you cannot edit a profile (and save it), if another profile has the same name.
So, start removing one-by-one each unnecessary profile, especially if it has the same name as other one.
Each deletion must be confirmed by one of these:
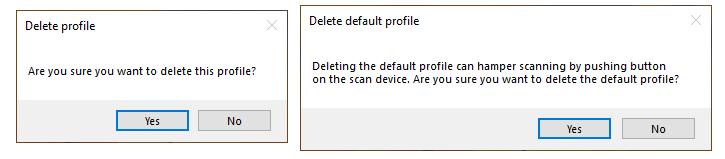
Depending on whether you’re trying to delete default profile or a regular one. If you need to keep both profiles that both have the same name, you must rename one of them to something else (like Documents –> Documents 2).
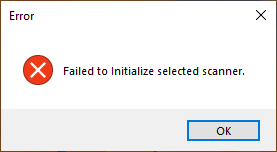
Unfortunately, you cannot do this (rename or delete profile) with any profile that belongs to a device that is not connected (or Windows cannot contact it for any other reason). Any attempt to do so ends with:
Changing default page size
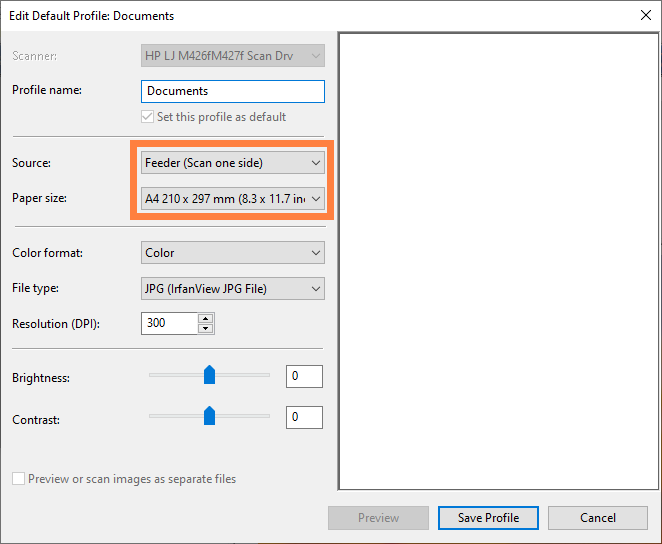
Check each and every profile that is left after above cleaning and edit it. As above, you can do this only for connected device’s profiles. Especially take a look at those profiles that are set as default ones.
Unfortunately even there you can set the page size only when switching from flatbed to document feeder:
So… that would be all. Unfortunately. You have two options left in this case:
- change page size each time you’re scanning
- install a non-native, printer vendor-provided scan driver and software that hasn’t got such stupid design.
Both options aren’t very promising. But… hey, Windows is messy, right?